A Salesforce Sandbox is like having a duplicate version of your Salesforce system, designed specifically for testing and experimentation. It allows you to trial new features, develop customisations, and train users—all without impacting your live production environment. The kind of sandbox you select will determine whether it can duplicate all or a portion of your data and metadata.
This blog will walk you through everything you need to know about what is Sandbox in Salesforce. including its types, uses, and benefits, to ensure you maximise this powerful tool.
Important Key Terms related to Salesforce Sandbox
It can all become evident if you understand a few essential terms. You can consider these terms to be your cheat sheet for mastering Sandbox navigation.
1. Metadata
Metadata is the backbone of your Salesforce setup. It includes all the configurations you’ve created, like fields, layouts, profiles, and automations.
2. Data Storage
Data Storage is all about how much room you have for your Salesforce records. These records could be anything—contacts, accounts, opportunities, or custom objects.
3. File Storage
The amount of space designated for files, like documents, photos, etc., is known as file storage. This is where all of your files go, whether you’re uploading contracts, presentations, or images.
4. Sandbox Types
Salesforce offers different types of Sandboxes, and each serves a unique purpose. The type you choose determines the amount of data storage available and how often you can refresh it.
5. Refresh Interval
The Refresh Interval tells you how frequently you can update a Sandbox from production.
6. Sandbox Template
A Sandbox Template is your way of deciding which Salesforce records are copied into the new Sandbox. Want only specific data for testing? Use a template to cherry-pick what gets included.
What is Sandbox in Salesforce?
A Salesforce Sandbox is a secure, isolated environment where you can replicate your organisation’s production setup for development, testing, and training purposes. It’s like having a virtual replica of your live Salesforce system, allowing you to experiment freely.
Every Sandbox includes a copy of your production organisation’s metadata—things like objects, fields, workflows, and page layouts. Depending on the type of Sandbox you choose, it might also contain data from your production environment, such as accounts, contacts, or custom records. This flexibility makes it easier to tailor your testing to match real-world scenarios.
Using a Sandbox isn’t just smart but it’s essential. You can spot issues before they impact your live system by testing changes in a Sandbox. This ensures your updates are reliable, your users stay happy, and your business keeps running smoothly.
Salesforce Sandboxes Benefits
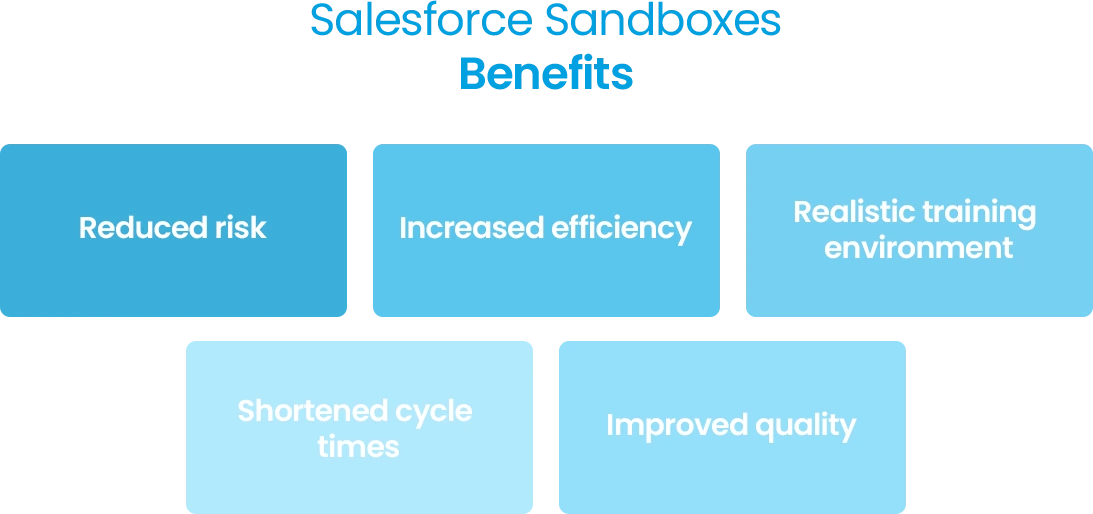
- Reduced risk: With a Sandbox you can test new code, configurations, and customisations without risking your production data and settings.
- Increased efficiency: Sandboxes can help you catch issues early in the development process, which can make code easier and less costly to fix.
- Realistic training environment: Sandboxes provide a realistic training environment for users, which can help them transition seamlessly to the production environment.
- Shortened cycle times: Sandboxes enable you to test changes against copies of your production data and users, which can shorten cycle times.
- Improved quality: Sandboxes allow you to detect and fix errors during the testing phase, which can improve the quality of your application.
Salesforce Sandbox Types
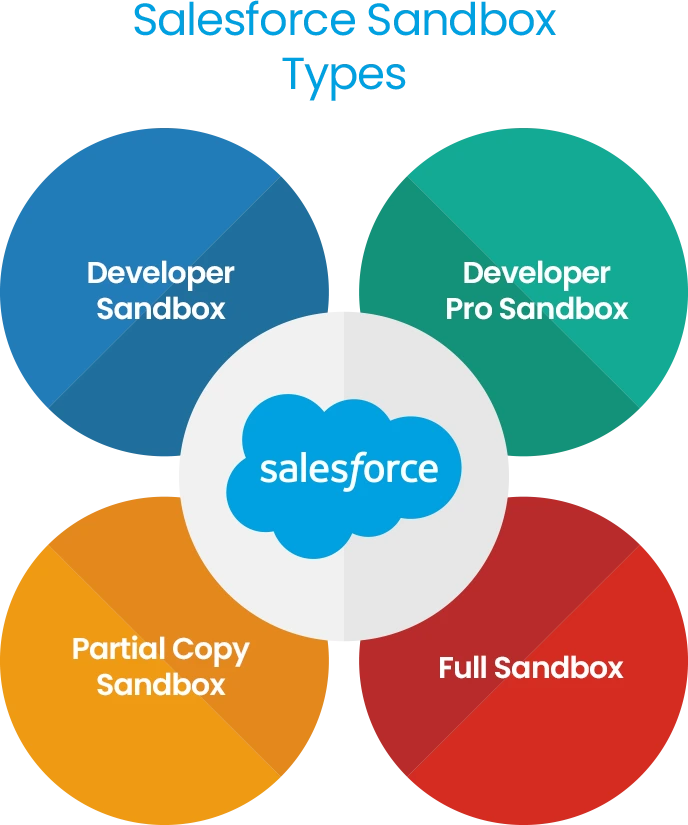
Salesforce offers four types of sandboxes, each designed for specific needs. These environments let you test, develop, and train without risking your live data. To help you choose the best one, let’s breakdown them.
1. Developer Sandbox
This is your starting point. Individual coding and testing tasks are best performed in a Developer Sandbox. It gives you a replica of your metadata (think objects, workflows, and layouts) but doesn’t include production data.
- Refresh Limit: Once a day
- Storage Limit: 200 MB for both data and files
If you’re working on smaller projects or initial testing, this sandbox has you covered. Most Salesforce licences include it, so it’s a handy default option.
2. Developer Pro Sandbox
Think of this as a Developer Sandbox with more room to breathe. It’s built for larger testing needs and includes 1 GB of storage for data and files. It is ideal for more complicated testing jobs because of this additional space.
- Refresh Limit: Once a day
- Storage Limit: 1 GB for both data and files
You’ll find Developer Pro Sandboxes in Salesforce’s Unlimited and Performance editions, or you can buy one separately.
3. Partial Copy Sandbox
Need to test real-world scenarios? Your production metadata and some of your live data are combined in a Partial Copy Sandbox. You can use a sandbox template to decide what data to include—perfect for testing new features or training users with realistic data.
- Refresh Limit: Every 5 days
- Storage Limit: Up to 5 GB of data and file storage, mirroring production
Available with Enterprise, Unlimited, and Performance editions, this sandbox lets you simulate a closer-to-reality environment.
4. Full Sandbox
The Full Sandbox is the big league. It’s a complete replica of your production environment, including all data and metadata. It is therefore the greatest choice for thorough testing, debugging, and end-to-end user training.
- Refresh Limit: Every 29 days
- Storage Limit: Matches your production instance
This sandbox ensures your testing environment is as close to live as it gets. It’s available with Unlimited and Performance editions or as an add-on.

Sandbox Allocations in Salesforce
Choosing the right sfdc sandbox isn’t just about the type—it’s also about how many you can use with your Salesforce edition. To meet the needs of your organisation, each edition provides a certain number of sandboxes. Let’s break it down:
|
Sandbox Type |
Professional |
Enterprise |
Performance |
Unlimited |
|
Developer |
10 |
25 |
100 |
100 |
|
Developer Pro |
– |
– |
5 |
5 |
|
Partial Copy |
– |
1 |
1 |
1 |
|
Full Copy |
– |
– |
1 |
1 |
Key Points to Remember:
- 10 Developer Sandboxes are available to you with the Professional Edition. Perfect for basic testing and small projects.
- With 1 Partial Copy Sandbox and 25 Developer Sandboxes, Enterprise Edition goes one step further. It enables more extensive testing and partial data replication.
- Performance and Unlimited Editions go all-in with up to 100 Developer Sandboxes, 5 Developer Pro Sandboxes, and full support for Partial and Full Copy Sandboxes. Large organisations handling intricate testing and training scenarios will benefit most from these editions.
Salesforce Sandbox Templates
Sandbox templates let you select specific objects and data to copy into your sandbox, making them perfect for creating focused testing or training environments. Remember, these templates are only available for Full and Partial Copy Sandboxes.
If your sfdc sandbox type doesn’t support templates, no data will be copied during setup. If so, you’ll have to either import test data, generate it manually, or use APEX scripts.
How to Create a Salesforce Sandbox?
1. Set Up Your Sandbox Template (If Needed)
If you plan to utilise the sandbox to replicate specific objects and data, start by creating a template. Templates make sure you have all the data you need and make setting up the sandbox easier.
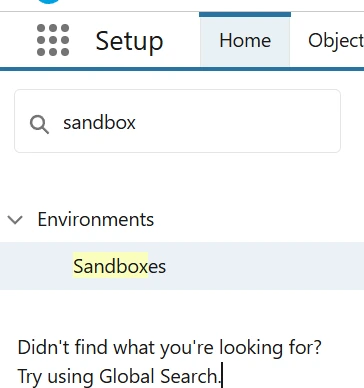
2. Navigate to the Sandboxes Section
- Navigate to Salesforce Setup.
- Click the Quick Find box and type Sandboxes.
- To begin the creation process, select New Sandbox.
3. Define Sandbox Details
- Name Your Sandbox: Give it a name and add a brief description.
- Select the Type: Choose the type of sandbox (e.g., Full Copy, Developer).
- Apply a Template (optional): Click the button if you made a sandbox template.
- Add Post-Creation Scripts (optional): You can add scripts to generate test data or automate tasks after creation.
4. Start the Process
Once you click Create, Salesforce will begin configuring your sandbox. The type determines how long it takes:
- Developer sandboxes are typically available in a matter of minutes.
- Full copy sandboxes may take up to 24 hours or longer, depending on the volume of data.
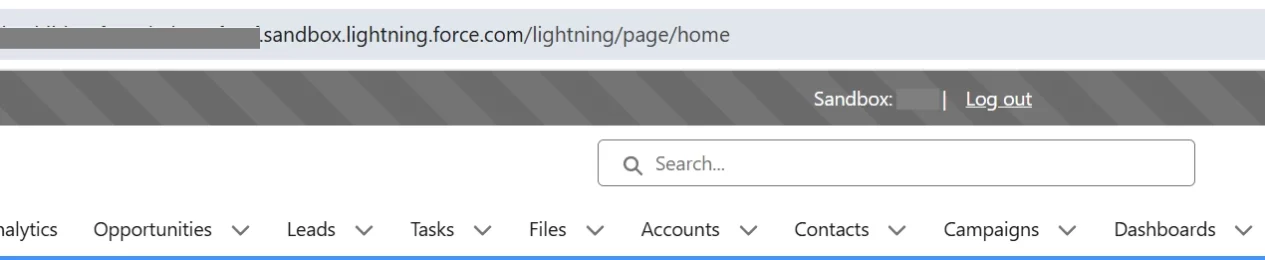
5. Logging In to Your Sandbox
Instead of using login.salesforce.com to log in, use test.salesforce.com once your sandbox is ready. Remember these points:
- Usernames: Any username that ends in “.sandboxname” is added (for example, tom@email.com.dev for a sandbox named “Dev”).
- Email Addresses: “.invalid” will be attached to all email addresses, except yours. Update them if you need to send password resets.
How to Refresh a Sandbox in Salesforce?
Imagine your Salesforce sandbox is out of sync with your production environment—it’s time for a refresh! Keeping your sandbox up to date is essential for testing and development, but it’s crucial to remember that refreshing wipes all existing data and metadata in the sandbox.
It replaces everything with the latest configuration from your live system. Thus, before you start, make sure you have backed up any modifications you wish to maintain in your sandbox.
Here’s how you can refresh your sandbox in a few simple steps:
- Navigate to Sandboxes in Setup:
Next, type “Sandboxes” into the Quick Find bar under Salesforce Setup. - Choose the Sandbox to Refresh:
Locate the sandbox on the list that you wish to update. If it’s eligible for a refresh, you’ll see the option to refresh next to its name. Click “Refresh” to start the process. - Follow the Refresh Wizard:
Salesforce will guide you through the refresh process. This is where you can customise settings, like whether you want the sandbox to auto-activate once it’s ready. - Wait for Completion:
If you didn’t select auto-activation, you’ll get an email notification when the refresh is complete. After that, you can activate the sandbox manually.
Consider referring to the Salesforce Release Updates Guide to stay updated on the latest functionalities and potential considerations when refreshing your sandbox in relation to new releases.
How to Deploy from Sandbox to Production?
- Change Sets
- Perfect for Salesforce administrators who like a point-and-click method.
- It is user-friendly and completely integrated with the Salesforce platform.
- Visual Studio Code
- A go-to tool for Salesforce Developers, part of the Developer Experience (DX) suite.
- It offers strong customisation options, but it does require some technical know-how.
- Metadata API
- Used by third-party tools like Gearset and Copado to streamline deployments.
- Part of Salesforce’s suite of APIs, providing advanced deployment flexibility.
- Ant Migration Tool
- Designed for developers who prefer working with command-line interfaces.
- Uses “packages” to bundle and deploy metadata changes.
Which Method Should You Choose?
The best option depends on your skill set and the complexity of the changes. For a quick, simple deployment, Change Sets are perfect. If you need more advanced capabilities, tools like Visual Studio Code or the Metadata API are your best bets.
Before deploying to production, always conduct extensive testing in a sandbox, regardless of the approach.
Best Practices for Using Salesforce Sandboxes
- Use sandboxes for unit testing: Sandboxes are used for unit testing; they are not for testing data.
- Limit the number of sites and products: Use a small set of sites and products.
- Avoid concurrent tasks: Avoid doing jobs in parallel.
- Delete outdated data: Remove old data, like source code versions.
When to Use a Sandbox
A Salesforce sandbox is like a playground for your org, giving you a safe space to experiment without risking your production environment. Whether you’re customising features, writing code, or training users, sandboxes are a must-have for keeping your live system secure and stable.
Here’s why you should use a sandbox:
- Isolate Customisations and Development Work:
Sandboxes lets you work on updates and features away from your production org. This ensures that any mistakes or bugs won’t affect your live system. - Test Changes with Production Data:
By using a sandbox that mirrors your production data and users, you can identify potential issues early and fix them before deployment. This is especially important when testing complex configurations or customisations, such as those built with Salesforce flow. - Train Users Effectively:
Sandboxes provide a risk-free environment to train your team on new features or processes, boosting confidence without disrupting live operations. - Streamline Deployments:
Once every change has been planned and tested independently in the sandbox, smoothly roll everything out to production.
Consider enrolling in the Salesforce OmniStudio Course to gain the skills to create engaging and effective user experiences.
Who Benefits from Sandboxes?
- Admins: Easily add and test new features before deploying them live.
- Solo Developers: Safely write and test code in an isolated environment.
- Development Teams: Work together to improve things without jeopardising the production org’s stability.
Take advantage of our Salesforce Admin training with Salesforce AI to bolster your fundamental Salesforce skills. And if you’re looking to improve your knowledge of Salesforce development then consider enrolling in Salesforce Platform Developer 1 Certification with Salesforce AI.
When Should You Use Each Type of Sandbox in Salesforce?
Choosing the right Salesforce sandbox for your needs can save you time and effort while ensuring your work stays organised. Different sandboxes serve different purposes, so let’s break it down to make your decision easier.
Here’s a handy guide to help you match your use case with the right sandbox type:
|
Use Case |
Developer |
Developer Pro |
Partial Copy |
Full |
|
Build |
✔ |
✔ |
||
|
Proof of Concept |
✔ |
✔ |
||
|
QA (Quality Assurance) |
✔ |
✔ |
✔ |
|
|
Integration Testing |
✔ |
✔ |
✔ |
✔ |
|
Batch Data Testing |
✔ |
✔ |
||
|
Training |
✔ |
✔ |
||
|
User Acceptance Testing |
✔ |
✔ |
||
|
Performance/Load Testing |
✔ |
|||
|
Staging |
✔ |
Conclusion
You might be wondering: Why should I use a Salesforce Sandbox? The answer is simple—sandboxes let you test and develop changes without disrupting your live production environment. By using a sandbox pipeline, you can thoroughly test updates, ensuring they’re ready for deployment.
A sandbox is essentially a copy of your production org, complete with configurations, customisations, apps, and code. Depending on the sandbox type, it might also include data to aid in testing. This makes Salesforce an essential tool for developers, architects, and administrators.
Remember, choosing the right sandbox type—whether it’s Developer, Partial Copy, or Full—can make all the difference in streamlining your development and deployment pipeline. And don’t forget to explore scratch orgs if you’re diving deeper into Salesforce development.
Quick tip: If you haven’t used your sandbox in more than 180 days, Salesforce will delete it. You should visit it often to keep it active.